Showing posts with label diy. Show all posts

Sunday, September 15, 2013

B is for Babies

It seems like a lot of people I know are starting to make announcements that cute little babies are on the way. I'm looking forward to meeting the little guys. Over the summer I went to a baby shower for one of my college friends and last weekend I went to the shower of one of my many cousins.
 
It's been a great excuse to use up some of my old scrapbooking supplies. Growing up I decided that I needed to document absolutely everything through scrapbooks, so I've built up a pretty healthy collection of craft papers and supplies that are just gathering dust with the exception of making cards every once in awhile. Once photo books came out through sites like my publisher, I kind of gave it up.
 
I used some of my old papers recently to make some bunting to use as ribbon for my college friend's baby shower gift and made a matching card. 


I also used my Silhouette machine (it's a machine that cuts paper into shapes and letters) for probably the first time ever for my cousin's baby shower gift wrapping. Jim bought it for me our first Christmas after we got married. He thought I'd like it because leading up to our wedding I spent a lot of time crafting - we had a heavy DIY wedding. It was super thoughtful, but after the wedding I didn't have any reason to use it. Until apparently now. Going forward I think all of our friends will get monogrammed baby gift wrapping. I don't think that's what Jim expected I'd use it for, but at least I'm using it now, right?
 
So thank you babies for giving me an excuse to craft again and giving me a reason to use the thoughtful gift from my husband (3 years later).

Baby showers are also a great chance to see the awesome crafting skills of my talented friends and family. At my cousin's (technically cousin-in-law) baby shower, her sister-in-laws, sisters and mom and mom in-law put threw the most adorable event. There were so many sweet details. There was a lot of thought and love put into it. How sweet is this little poem at each guest's seat?
 
I also loved the centerpieces. One of the hosts, my cousin M, wanted to have baby block centerpieces. When she couldn't find them pre-made, she decided to go the DIY route and created these beautiful centerpieces getting the supplies at A.C. Moore and ordering bulk hydrangeas through BJs. They came out awesome. There were so many other thoughtful details like homemade chocolate covered Oreo favors made by the mom-to-be's sister in law. 
It was a lot of fun to spend time celebrating the soon to be baby and spending time with friends and family in such a pretty setting.

I'm apparently on the watch list for the next in line to have a baby. I guess that happens when you're about to hit three years of marriage and inching closer to 30. For now, I'm just enjoying celebrating other people's babies.

Are you and your friends in the baby stage? Any tips on using up old scrapbook paper or cool ideas on things to make with a silhouette machine?

Monday, August 19, 2013

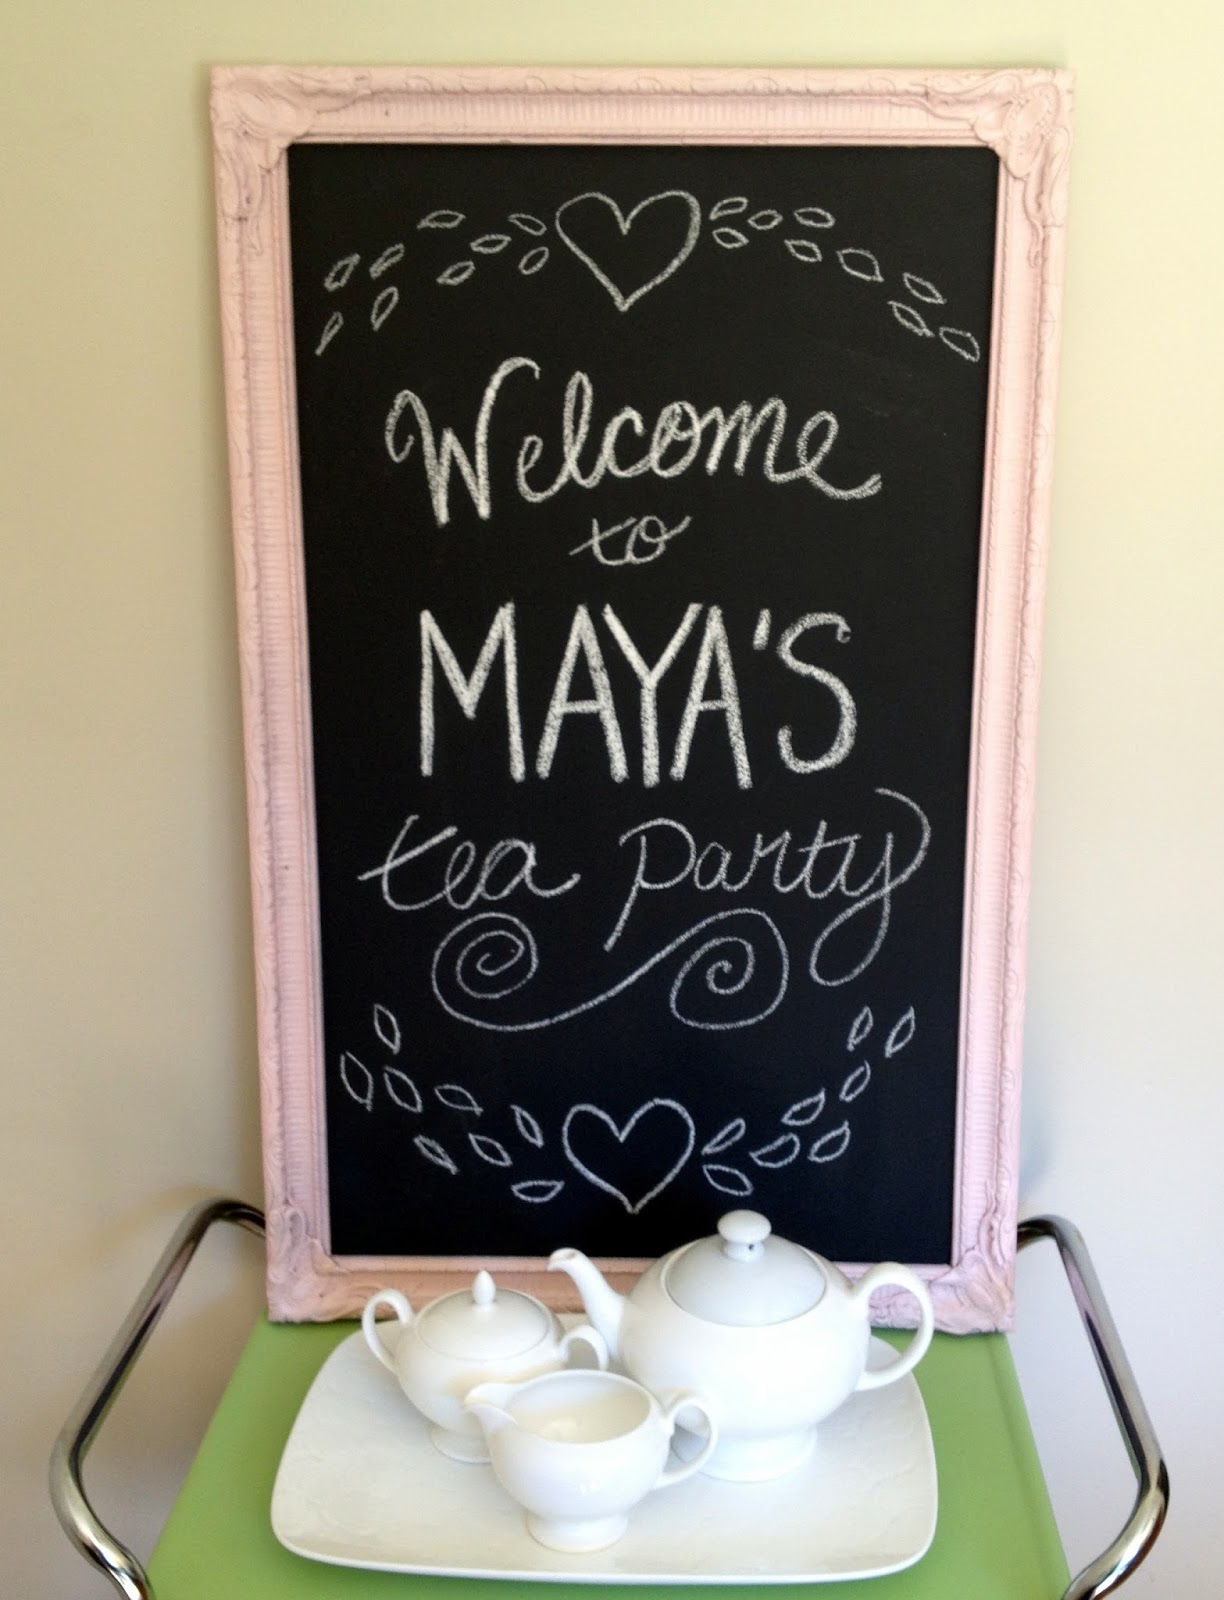
Another DIY Chalkboard, but in pink!

 
Jim and I made a bunch of diy chalkboards awhile back to create a gallery wall in our dining room. I put different quotes and illustrations on them depending on the holiday or time of year. It's one of my favorite projects that we've done and so simple! When I started working on the attic project at my mom's she asked me to make one for my niece. Right now the room is pretty much a playroom just for her, until other grandkids come along.
 
My niece wanted a pink and green room. Right now, the base of everything is green. We thought a green base would work better for a room that could work for boys and girls. The chalkboard was a perfect way to add some pink. 

She loves tea parties, so when we do the big reveal to my favorite four year old, we thought it would be fun to have the room set up like a tea party.

I'm so excited to show her the room!

Sunday, August 11, 2013

Bar Cart Reno

We've been looking for ways to add more color to our open living/dining area. We've been adding lots of green in small ways, but we wanted to add something a little more bold. We came across an old bar cart and decided its just what we need to make the room a little more lively.

We found it for a pretty awesome price. I think it was around $15/$20 at an antique mall. We found almost the same cart and a few other re-finished ones at another antique shop for around $75. We had thought about buying one until we saw the price tags, so this seemed like a great deal.

Jim took the bar cart apart and cleaned it completely. We decided to keep the structure the same and only paint the shelves. Once it was apart, it was easy to spray the shelves and not worry about getting paint on the silver area. After two or three coats of the green paint, he sprayed it with a clear protective coat. Jim put it back together and added new wheels and it looks good as new!

It's just what we needed to add a pop of color in the dining area. It's also fun to use it to style a bit and make the room look a little more interesting and put together. It creates a really fun vignette. We're planning to add an art piece over it to finish off this little nook.

Any advice on where to find good art work for a dining area? I love shopping on Etsy, so if you know of any great shops, please send them our way!

Wednesday, August 8, 2012

DIY: Chalkboard Gift Tags

I've been on a crafting hiatus for awhile, but now that my mom's birthday is around the corner, I figured it was time to make something special. I got my crafty genes from her, so I love giving her diy gifts.
This year's gift is chalkboard tags. My mom had seen them somewhere awhile back and thought they were neat. They were a super easy diy project.
All you need to make them is:
  • thick card stock/cardboard
  • chalkboard paint
  • scissors
  • hole punch
  • ribbon
It's pretty much a three step process. Step one- cut out tag shapes on the card board/card stock (I used a super thick cardboard recycled from a shipping box). I free styled it and cut out random shapes. They aren't perfect, but they'll do. A better idea would have been too find a template. Second step- use the hole puncher to make a slot for the ribbons. Third- paint the cardboard with chalkboard paint. I did two coats on each side to make it more durable.

I thought I was done with the project, but then I came across these gorgeous chalkboard tags from Kate's Paper Goods with pretty flowers painted on. I have a ton of paint from past projects, so thought I'd give it a try and I don't think they turned out half bad. What do you think?
I have a bunch of plain tags and I'm thinking I should paint a few more. Any fun suggestions for designs? I'm thinking a few more Christmas ones and some birthday designs- maybe confetti? The fun thing is, I don't need to do too many, since these can be re-used!

Sunday, January 29, 2012

Chalkboard Gallery Wall- Final Reveal

 This weekend, Jim added the fifth and final diy chalkboard to our gallery wall. He also fixed the others, which were really crooked. He used self adhesive rubber bumpers, which can be found at your local hardware store, to straighten out the chalkboard which were crooked.
They are super easy to use, you just apply them to the back of the frame on the corners. Then straighten them to where you would like. The bumpers are also helpful to protect furniture, we have similar ones on our bedroom furniture, which hold the glass tops onto our dresser and nightstands. I'm not actually sure they are supposed to be used for straightening wall hangings, but Jim thought they would work and they did, which is helpful since a few of the frames were looking too crooked to me.

Before:

After:

Are there any products you use for something other than their intended use? 

Sunday, January 8, 2012

DIY Chalkboard Gallery Wall

Last month, I shared Jim's DIY mirror to chalkboard makeover. It ended up being the first of five chalkboards. Four of which now hang in our dining area. I've seen tons of photos on Pinterest that have a chalkboard included in a wall gallery, but I thought it would be fun to do all chalkboards.

The plan has always been to do neutrals in our living spaces, so I can mix up the decor for holidays. I think the chalkboards will be a fun and cheap way to get more festive. All we'll have to do is write something like "Merry Christmas" and it instantly makes the room a little more holiday ready.
 We still want to add one more chalkboard in the top right hand corner, but I was getting to impatient to share the project. Jim has literally been working on this for months. It started back in the summer, when we went thrifting for the first time. I found a mirror and Jim transformed it into a chalkboard, you can find details here.

Over time we've slowly been collecting the next few to add to the wall gallery. We wanted to get a couple interesting frames and some that were less ornate. We ended up finding everything we needed at our two local shops, it just took some time. We used 2 mirrors and the rest were empty frames.
 It's been fun collecting the frames together. It's my favorite project so far.
We still have a ways to go though. We need to add the last frame and we need to get some thing to make the frames centered. They are looking a little crooked right now, but Jim said it's nbd, he can get something form the local hardware store to fix that. Once it's complete, I'll do a final reveal!

Are you working on any exciting projects you want to share?

Monday, December 19, 2011

Mirror to Chalkboard re-do

A few months ago, I discovered chalkboard paint and I've been so excited to test it out. After we bought an old mirror, I thought it would be fun to swtich out the mirror and make it into a chalkboard. I loved the ornate frame.
I was really excited to start this project. We went to Home Depot and bought chalkboard paint, spray paint, a wood panel, and some extra paint rollers. I had every intention of starting the project that week. Then things came up and it sat in the garage. As the weeks went on, Jim was getting antsy. One night while I was making supper, Jim told me he was going to cut the wood for the backing. Jim traced the shape of the mirror on to the wood then used a jigsaw to cut it down.
He then used a sander to fix the edges and smooth it out.
After the backing was complete, I thought I'd step in, but he just kept going. He did a coat of the chalkboard paint and let it dry. The next night he added a second coat and then decided to spray the frame. He did it outside and had the smart idea of hanging it so he could get all the different angles.
I absolutely love the look of it. Now we just have to figure out where to hang it.
Didn't Jim do a great job?

Thursday, October 6, 2011

Night Stand Re-do

I recently shared our dresser renovation on my friend Amanda's blog, Love & Renovations. We actually have more pieces to the set and we recently finished piece number two- one of the night stands.

We followed all of the same steps in our first post, but this time, we sanded down the drawer more to prevent from sticking.

I had originally said this set was from my grandparents, but after my mom read the post she corrected me and let me know that it was from my great grand parents. So it's more of an heirloom than I thought, which makes it all the more special. We still have another night stand to refinish and a bureau with a mirror, which is at my mom's. Some where along the way, the bed was given away, but I'm happy we have the other pieces around. When my mom and brother heard we were renovating our pieces for future kids rooms, they both offered to give us their pieces to complete the set.

We aren't planning on having kids any time soon, so we're good with the three pieces we have now for our craft room storage, but I'm excited to one day have all these pieces together. I think they'll look perfect in a kid's room because the white pops so nicely against bright colored walls.

Do you have any heirloom pieces in your family? Would you renovate an heirloom or want to keep it in original condition?

Monday, July 25, 2011

Dresser Re-Do

When my mom sold my childhood home last year, she gave me a dresser that was originally my grandparents. It's third generation now that she handed it down to J and me. We've had it sitting in our garage since we moved. I'm pretty excited because we finally dusted it off and we have some big plans for it!

Even though I'm not crazy about the finish, it has amazing character.

The flower detailing is my favorite.
I also love the hardware.
When my mom was going to get rid of the dresser, I couldn't resist. I had been planning to try out some diy renovation, but hadn't found a piece I really loved yet. We ended up taking the dresser and a matching night stand.
We've already completed sanding it. I'm currently priming it and I'm hoping to finish this project soon. That means it's time to finally decide what color we want to go with.

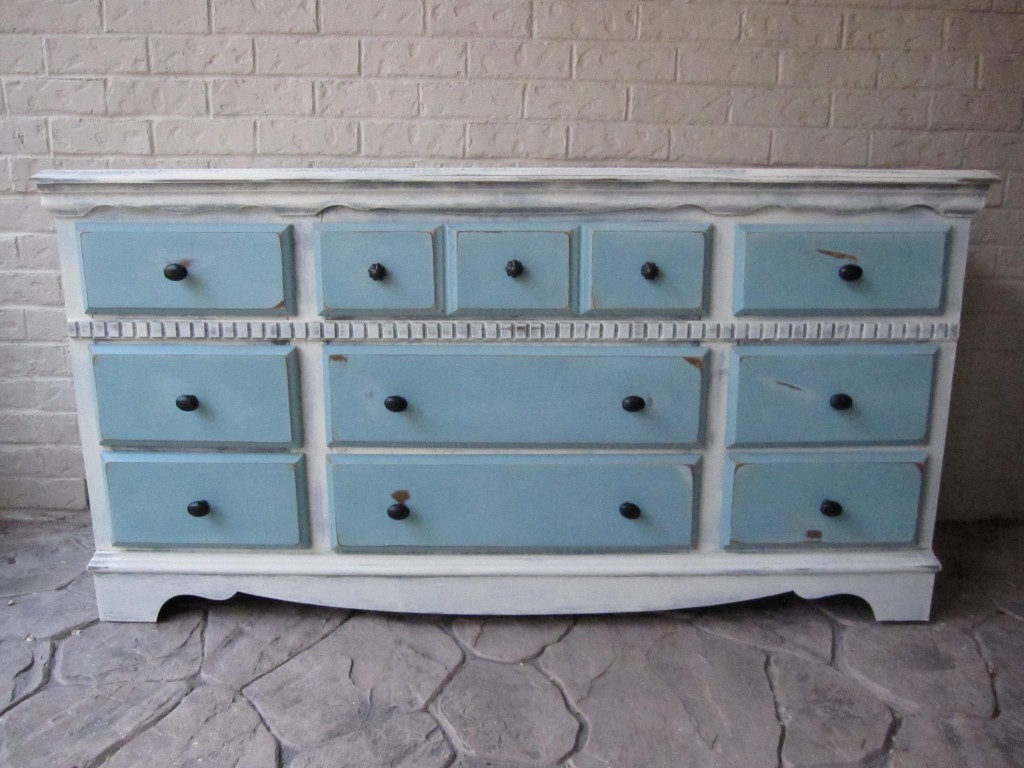
I originally planned to go with white. I think it's classic and will look awesome against our bright blue walls, but as I was researching diy dresser renovations, I came across another idea that inspired me.

I think the blue drawers add a fun pop of color. The other idea I'm toying with is doing some type of pattern or graphic print either on the drawers, top or side.
So, it's between classic white, a pop of color, or add a fun print. What would you do?

Just for reference, it will be going in this room (don't mind the paint cans):
Also, if you've re-painted a piece of furniture did you use paint or spray paint? I'm planning to paint, but I'm wondering if spray paint would have been the eaiser way to go.